
How to Use the Customer Feature on OMICall
Reading time: 8 minutes
Knowing how to utilize the customer management feature helps businesses fully leverage the potential of their management system. This enables effective customer data classification and management, enhances service quality, and optimizes business strategies.
Introduction to the Customer Feature
The Customer feature on OMICall allows business owners and merchants to store customer information systematically. This enables businesses to reach, communicate, and interact with customers more effectively while accurately understanding their needs. Doing so not only improves customer care quality but also optimizes support strategies, ultimately boosting business performance.
How to Effectively Use the Customer Feature
Customer Management
List View
Access the “List” tab on the Customer screen. Here, you will see a list displaying all the customers you manage or are associated with.
Status View
To view and manage customer statuses, access the “Status” tab on the Customer screen. Here, all your customers are displayed in a Kanban board format.
This Kanban board is divided into columns, with each column representing a specific customer status. Customers are placed in the column corresponding to their current status.
You can easily change a customer’s status by dragging and dropping them into the column corresponding to the new status.
Customer Filters
Filters allow you to easily categorize customers based on available attributes. If you cannot find the desired filter value, use the “Other Filters” button to search for additional filtering attributes. To clear current filter values, click the “Reset” button.
Using filters helps you quickly isolate customers you have created or those assigned to you, making customer tracking and management more convenient and efficient.
Customer Search
To search for customers, simply enter a keyword into the search bar at the top of the list. By default, the search function operates based on basic information such as Name, Phone Number, and Email. If you wish to search using other attributes, select the “Basic/Other Info” option.
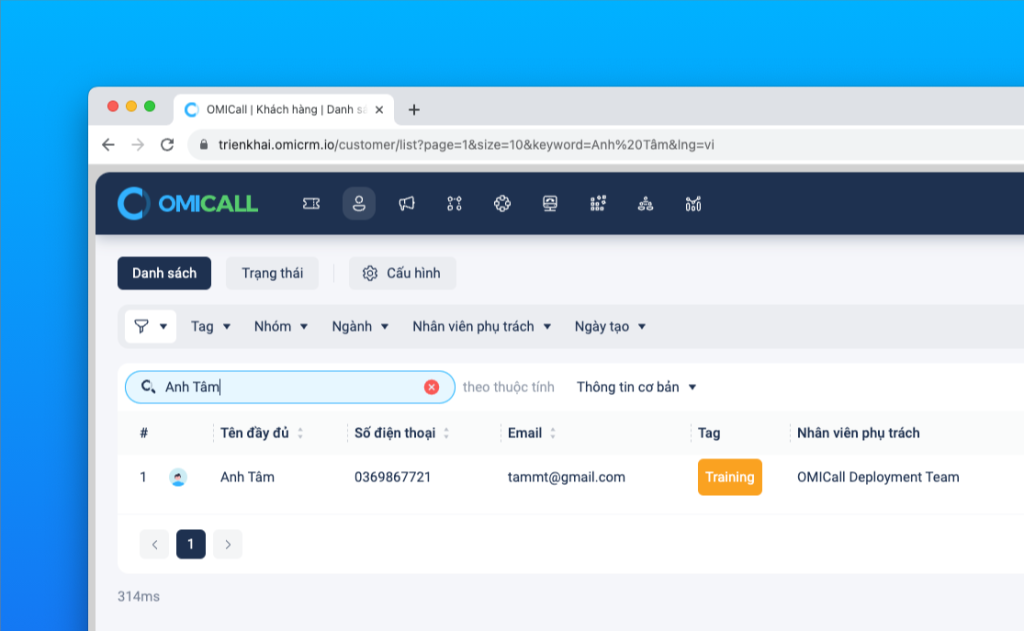
Customer Search
Display Configuration
The “Display Configuration” button is located at the top right of the customer list. This button allows you to customize the display of customer attribute fields according to your specific needs. You can rearrange the order or toggle fields on and off, enabling quick information lookup directly within the list without needing to open individual customer details.
Status Change
At the top of the screen is the area displaying customer status sets. These status sets facilitate effective management of customer engagement.
To change a customer’s status, click on the current status and select a new one. When changing the status, you can record details regarding previous interactions.
A customer can be assigned multiple status sets—ranging from a simple single-level system to a complex two-level structure—depending on the business’s management requirements.
Customer Interactions
The “Customer Interactions” section stores the complete history of interactions with the customer, including activities such as status changes, responses, information updates, calls, evaluations, and notes.
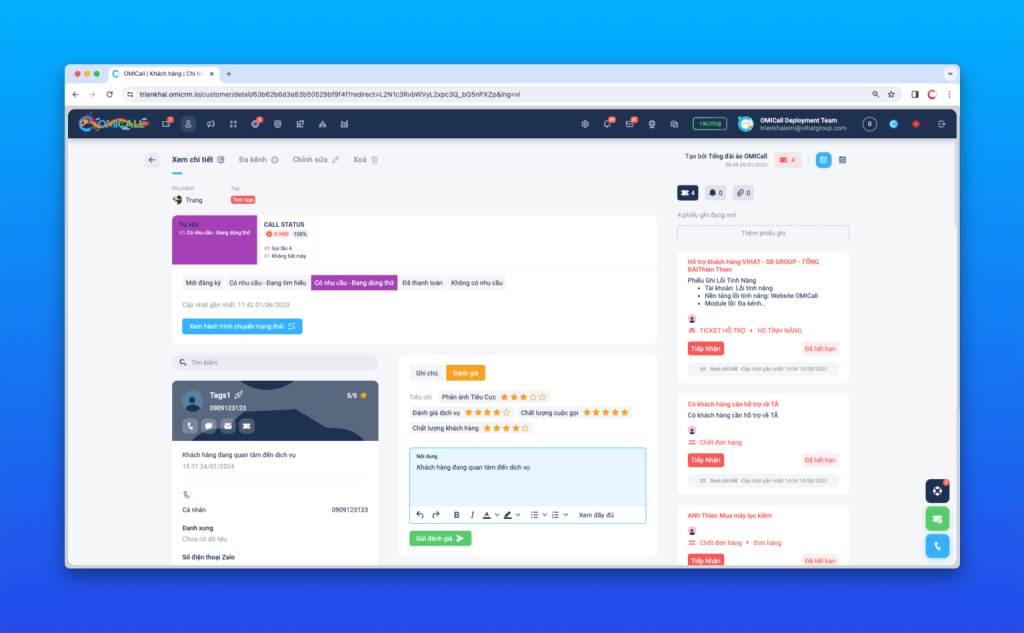
Customer Interaction
Other Actions
In the list view, right-click on any customer to perform the following actions:
- Make calls, send SMS/Email: Quickly contact customers.
- Create notes/reminders: Add notes or set reminders.
- View details in a new tab: Open the customer details page in a separate new tab.
- View details: Open the customer details page in the current tab.
- Update information: Add or remove customer attributes (tags, groups, industries, etc.).
- Reassign: Change the person responsible for managing the customer.
- Export to Excel: Export customer information to an Excel file.
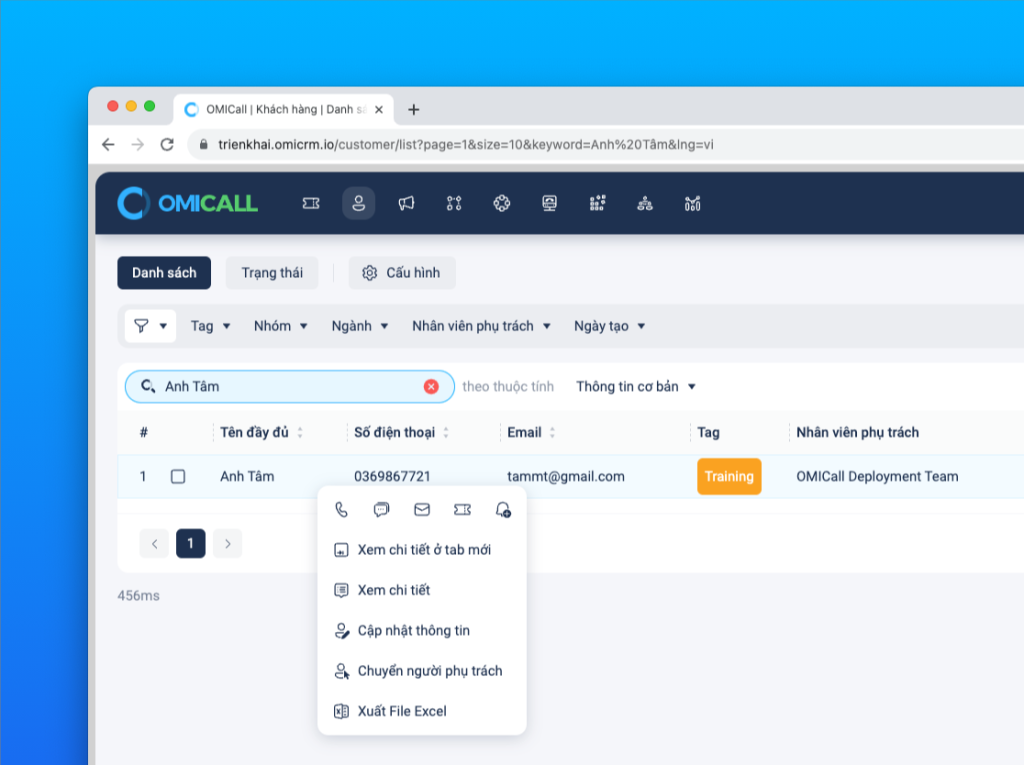
Other operations
You can select multiple customers to update their information simultaneously, which saves time.
Adding customers
Manual addition
To add a customer manually, click the “Add new” button. A customer information entry window will appear.
- Mandatory information: When adding a new customer, you must enter two required fields: Full Name and Phone Number.
- Additional information: Other details can be added later as you learn more about the customer.
- Phone number check: The system verifies that the phone number is unique. If the number already exists in the system, you will receive a notification and will not be able to add a new customer using that number.
Add via Excel file
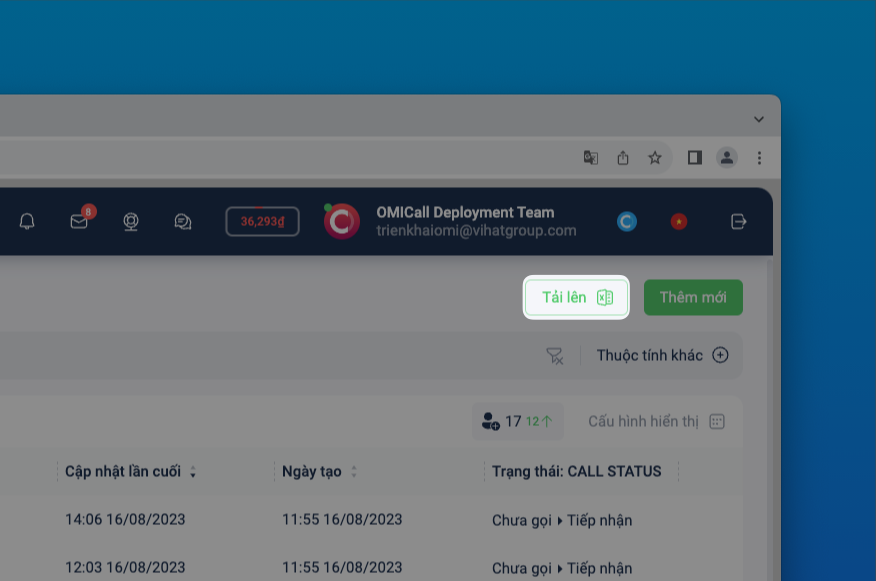
Adding customers via Excel file
To add customers automatically, click the “Upload” button. You can add up to 5,000 customers per upload. Here are the detailed steps:
- Download the Excel template: Download the template from the system.
- Enter customer information: Fill in the required customer details in the downloaded Excel template. Note:
- Mandatory information: The Excel file must include at least two mandatory columns: Full Name and Phone Number.
- Data format: All data fields must be in Text format.
- Upload the Excel file: Select the completed Excel file and upload it to the system.
Important note regarding the Excel file:
- Correct formatting: The Excel file must adhere to the required format and contain complete information. The system will validate the data and report errors if any information is incorrect or missing.
- Duplicate check: Phone numbers must be unique. In the event of a duplicate, the system will return an error report specifying the affected rows, allowing you to easily cross-check and make corrections.
- Valid data: Valid data will be successfully uploaded to the system and will remain unaffected by any rows containing errors.
Customer Configuration
To effectively utilize the customer management feature, it is essential to have a clear understanding of customer configuration.
Each customer record can be associated with one or more statuses, with each status comprising its own set of attributes and values. This allows business owners to define various statuses applicable to individual customers, thereby enhancing the efficiency of customer data management.
How to Configure Customer Statuses and Attributes:
- Access Configuration: Click the “Configuration” button next to the feature tabs on the Customer screen or the “Settings” icon on the main menu bar.
- Navigate to the Attributes Menu: Select “Attributes” from the menu, then choose “Customer” to begin configuring statuses and attributes.
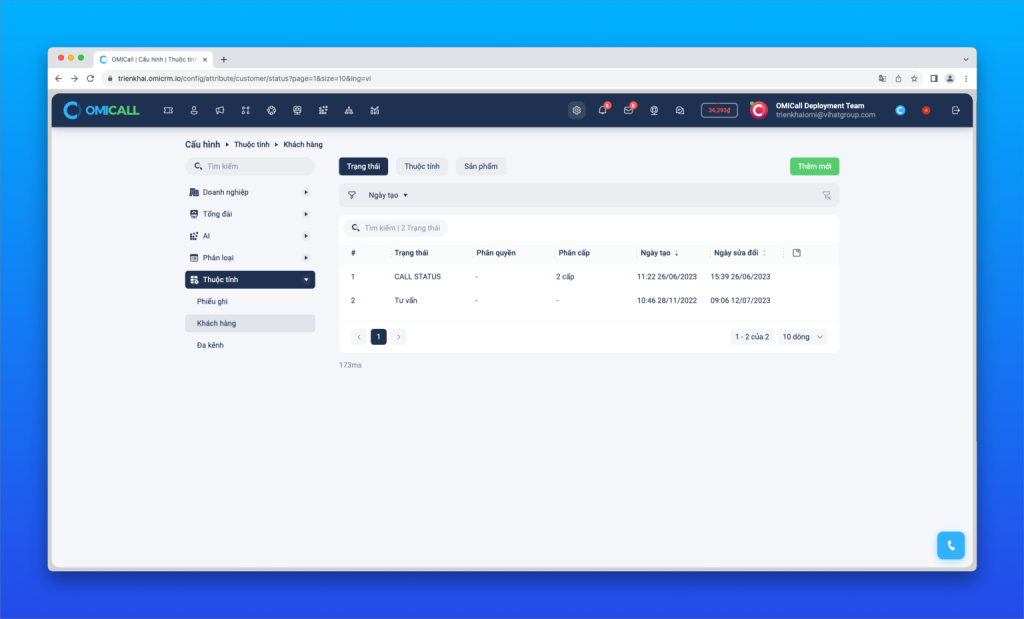
Customer Configuration within the Customer Feature
Customer Status
In the system, status reflects the customer journey and can be configured to suit your management needs. Users can:
- Customize status values: Configure the values and attributes of each status to align with your customer storage and management processes.
- Name statuses: Select and assign names to statuses that are easily recognizable and suited to your business needs.
- Select colors for each status: Assign a specific color to each status to enhance visibility, making it easier for users to distinguish and manage statuses during the ticket processing workflow.
This makes customer journey management more intuitive and efficient.
Customer Attributes
In this configuration section, you can easily customize and organize attributes to suit your business’s management needs:
- Arrange attribute positions: Customize and rearrange attributes so they appear in your desired order.
- Remove unnecessary attributes: Click the “X” button to delete existing attribute fields from the system.
- Add new attributes: If the current attribute fields do not meet your needs, you can click the “Add attribute” button to create new, suitable attributes.
You can add various new attributes to ensure that all necessary customer information is stored and managed effectively.
Customer Segmentation
Segmenting customers helps businesses identify potential clients and manage customer data efficiently. This enables businesses to:
- Identify potential customers
- Manage data effectively
- Optimize business strategies.
Conclusion
In summary, mastering the use of customer features enables businesses to effectively categorize prospects and manage data, thereby increasing opportunities for success and sustainable growth.
For further information, please contact:
VIHAT TECHNOLOGY Co., Ltd
Headquarters: ViHAT Building – 06 Street No. 16 (Him Lam Residential Area) – Hiep Binh Chanh Ward – Thu Duc District – Ho Chi Minh City
Hanoi Branch: Floor 15, LADECO Building, 266 Doi Can, Ba Dinh, Hanoi
Cambodia Branch: Thida Rath #154 St. 33MC, Sangkat Steung Meanchey, Khan Mean Chey, Phnom Penh

-
 What is TikTok advertising? Advertising policies and how it works.
-
 Exploring Conceptual Selling – Understanding Modern Sales Trends Correctly
-
 What is a KOC? Distinguishing between KOLs and KOCs.
-
 What Are Customer Insights? Revealing How to Effectively Uncover Them
-
 What is Digital Marketing? 10 Effective Forms of Digital Marketing
-
 What is Online Marketing? Types of Online Marketing